Air Bending Boots (September 28, 2013)

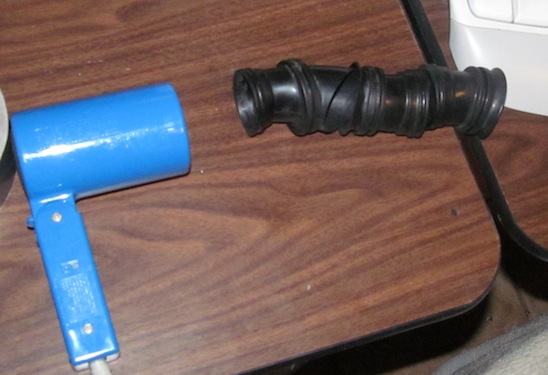
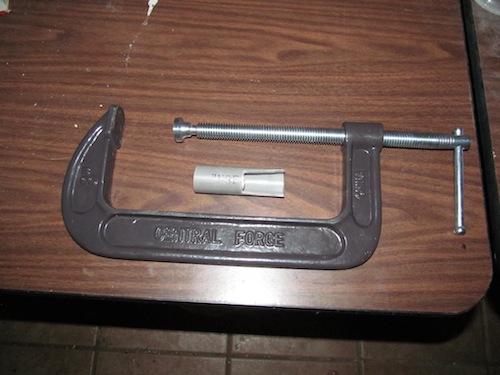
One of the problems with working with 30 year old bikes is working with 30 year old rubbers.  Note that said 30 year old rubbers tend to harden, and shrink, so they no longer fit right and are a pain in the nether parts to remove and reinstall.  One method of softening the hard rubber air boots that join the carburetors to the air box is to blow hot air on them with a hair dryer.  This will soften them, i.e. make them flexible, so they are easier to install.  Unfortunatley they only retain the flexibily while they are warm.  As they cool down while you are trying to install them they will stiffen up and be next to impossible to install without using the hair dryer outside and holding it with the 3rd arm and hand you had to grow through evolution just for this purpose.

20130928_airboots_5578

The Duke of Hazard Flasher (September 27, 2013)

Note to Self:  Be careful when working around carbs with the seat open.  If you close the seat make sure nothing that can be damaged is hanging around the seat supports or frame, especially when you are closing the seat to lean on it for leverage.  Fortunatley this is only my hazard flasher and not the regular blinker (turn signal) flashing unit.

20130927_hazardflasher_5564

Carb Flap Fix (September 25, 2013)

Waited over night for the JB weld to dry.  The flaps came out good & except for #3 installed well.  Note to Self:  Do not cover thin silver flexible strip and ballbearing on back with JB weld.  This needs to flex as the flap slides down and into the carb body.  Had to cut out the extra JB weld so it would operate properly.

20130925_flapsfixed

Carb Assembly (September 23, 2013)

Finished putting the cylinder head, camshafts, chain, and cover back on yesterday & am now putting the carbs back together.  Bowls floats and needles have been cleaned and reinstalled so now I just need to finish the top end.  Working on the missing flaps on the slides & am wondering if I should even bother installing the slides.  It’s not like they’re really needed in the first place when they have holes in them.  But, just to give it a shot, I took a couple of picture frame holders and snapped them down to the right size and put them in the slides & have them held in place by the existing springs.  See picture.  Now how to keep them there?  J&B weld.  Covered over them on both sides & am waiting for it to dry so I can sand any rough edges down.  In the meantime what to do?  Go to autozone & buy some motorcycle oil … tomorrow.  Reinstall everything on Wednesday after the J&B weld has had the proper drying time and is checked for fit …

Note in the picture the middle two slides have the replacement flaps.  Outside two are the originals.  Pre-J&B weld.  Pics of the J&B weld fit tomorrow ….


20130923_kz550_carbflaps

Engine Assemble! (September 9, 2013)

Started putting the engine back together today.  Made good progress until I went to tighten down the cam cover & was torquing the 1st bolt with my torque wrench.  Broke the bolt  … in the hole with the cover on and all other screws hand tightened.  New gasket installed with gasket tack.  Great.  Get to take it all the screws out tomorrow (just from the cam cover), buy an extractor set, and hope the gasket is quite reusable.

In better news it will be on to the carburetor after that.  hopefully later this week I can try putting it on & seeing if it starts again.  Without breaking any more bolts.

Valve Compression Tool Insall (September 3, 2013)

Finally had the time to modify my valve compression tool & use it to reinstall the valves & the keepers.  The keepers are the hard part.  Always wear safety goggles when doing this.  The springs can uncompress quickly when the tool slips & you’ll get a socket, keeper, spring, or something in the face at a high velocity.  Despite 4 or 5 spring incidents I was only hit in the face twice – once in the lip with a socket and once between the eyes (but on the safety goggles) with the valve cap.

Note the tool is the same 8-inch c-clamp from harborfreight – just cut a piece of 3/4″ pvc conduit to a useable length, cut out a section (pipe cutting tool & huge pliers to break it off).  This works like a charm.  The pvc is a little flexible but that helped in my case to spread the load & not scratch the aluminum engine block and the hole I made in it is much easier to work with.

20130903_valvecompresstool_4817