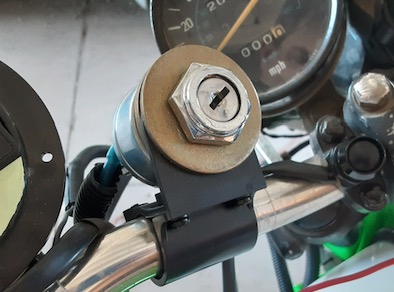
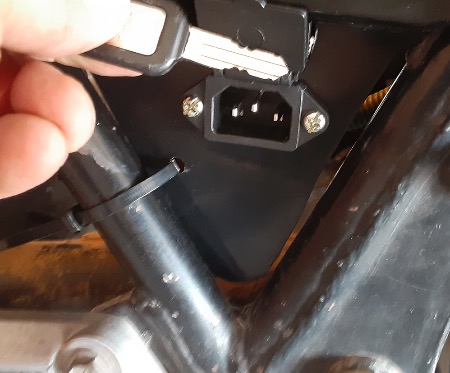
Had some trouble with the cutoff switch staying in place in the original charger port on/off switch and location so i bought a new switchable C14 port for charger use. This piece is fused and good up to 240v and 10 amps. a bit overkill for my 72v system but i like the idea of the charging port not being live all of the time.
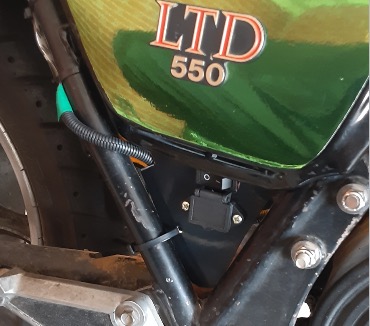
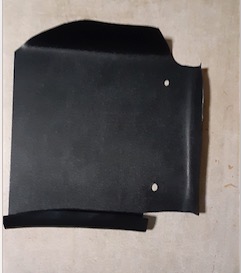
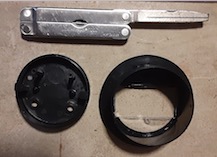
Picture of the new charging connection (C14 style) along with the 2-point mounting bracket that fits under the right side panel.
Having finally got the tank back from the shop, and having to smooth out bubbles in the chrome green wrap (i was not charged for the tank wrapping), it was time to start the accents on the fairings. Note that whilte the side panel green appears to be different these are the same color and come from the same roll of vinyl wrap.
So after a few months of using the SAE connection on the charger there’re a few shortfalls I figure I need to change connection type to address.
First problem was having the rubber protective cover to put over then ends slide off sometimes. Not really a big deal if the end of the cable is on the ground but not really good if the end is above the batteries and the exposed metal touches frame or battery metal.
Second problem was noticing that every time I plug it in there’s a spark between when the metal connectors meet.
Third problem is that the SAE connectors are only rated for 30 amps at 12v/24v, not for 30 amps or even 10 amps at 84v, which is the charging voltage. While the connectors held when charging at 10 amps, and the batteries charged faster, the plastic/rubber ends became soft and really warm to touch. When charging at 5 amps the plastic/rubber ends become really warm, but not melty warm.
The C13/C14 connectors are rated for 10 amps at 250V so not thinking there should be a problem using in this application as the 5/10 amp charger came with one with 16 ga leads to use as an adapter to other connectors – and unlike the SAE connectors it did not get melty warm when charging at 10 amps or even warm when charging to 5 amps.
SAE connector with rubber cover, meet Mr. Melty Connector
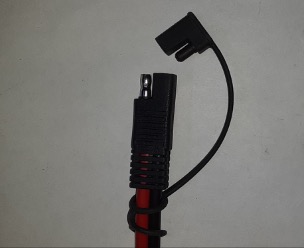
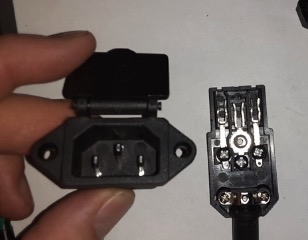
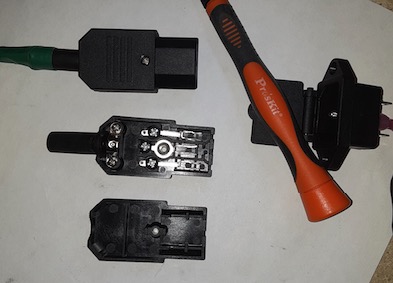
C14 male connector to mount on bike somewhere and C13 female adapter placed on charging cable direct
Finished connector beside open connector pictured by male C14 plug to be installed on bike
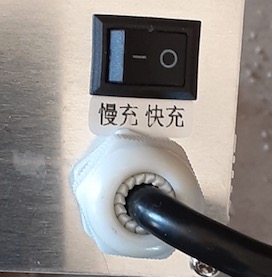
As the SAE solar type connection limited charging to 5 amps I finally got around to upgrading the charging port to a standard C14 connector. This allows me to use any standard C13/C14/C15 extension cable from my chargers and to easily make a female connector for any future charger. The C14/C15 port is rated for 10 amps at 240 volts so it should handle 10 amps at 84 volts fine (it does, the SAE connectors become melty when charging at 10 amps as they are only rated for 30 amps at 24v max, or 8 amps at 84 volts).
installed charging port with spring cover and on/off switch
installed charging port with cover open
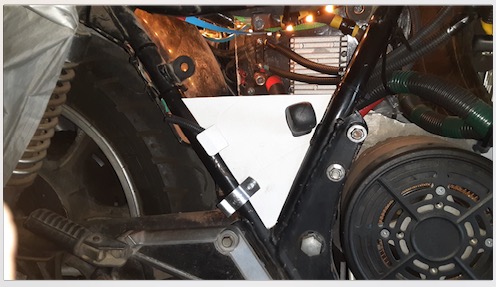
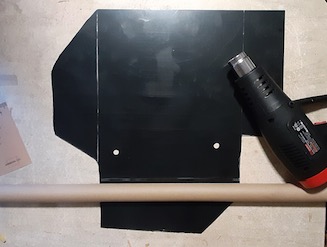
template fitting, screwdriver is in side panel mount hole
mounting bracket in ABS along with cardboad template
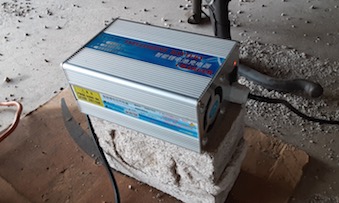
So my Amazon purchased 5 amp/10 amp charger finally arrived from China direct after 3 weeks. No complaints or knocks on China, seems to be a good product & does what it is supposed to do. So far I have only used it to charge on 10 amps & it really cuts down my charge time. Charging with my 3 amp charger could take 11 hours for a similar charge level – this one takes about 3.5 hours.
The interesting part is trying to see what charge level the battery settles to after a couple of days of having been charged to its theoretical maximum (82 V or slightly higher). The batteries are all used Nissan Leaf Gen 1 versions so there’s a known decrease in performance in higher heat days and a noticeable increase in performance on cooler days.
10 amp charger in action, set on a brick to help keep ground level dust out of the cooling fan
Cleverly disguised as an on/off switch this is actually a low / high charge rate switch. low charge rate (5 amps) is on the left and high charge rate (10 amps is on the right.
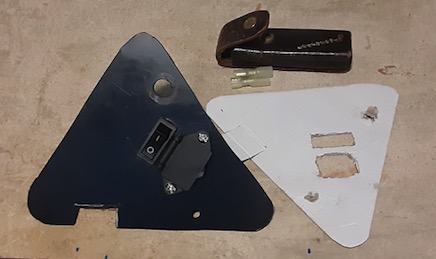
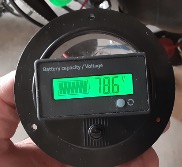
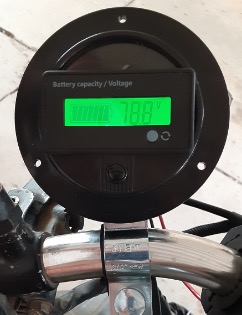
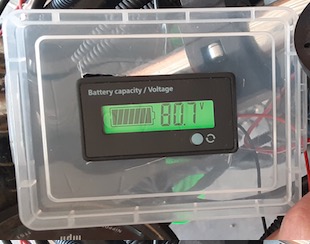
So I didn’t really care for the rectangular container for the voltmeter & haven’t been able to find a round digital one of the size and type I want. So … what to do? Make your own case, came the reply from nowhere. So I did.
Started with a previous bad voltmeter, took the screws out, took the guts out, took a drill and a leatherman to the front of it after tracing the bottom of my voltmeter with a sharpie, and then installed. Note that a sharpie is not the best tool for marking on plexiglass.
Started test riding on April 2, 2021 at 19884 miles. Currently up to 19996 miles, or 112 since beginning to ride it. Each basic commute to work is 15 miles, and roughly 3.2 volts. Riding into a headwind home cost an extra volt so it can be 3.6 volts for 7.6 miles or 2.8 volts. Also only took 1.8 volts on a 100 deg day instead of a 104 degree day.
Obviously a lot to learn on weather effects on mileage (cooler weather = less volts used for the same distance), hotter weather, long up hill drives, heavy throttle use, head winds, all = lower miles per volt used. Average mileage per volt has ranged from 2.2 miles/volt to 3.7 miles/volt.
So the original analog meter got stuck about 16 or so volts above actual (or above something) after the first test ride. Replacing it with this one, once I figure out how to mount it in a secure and stable way. Would also be nice if I could get consistent readings across multiple electric volt meters but there seems to be a consistent difference between 0.3 v and 0.7 volts.